Tuesday
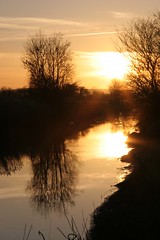
Two suns in the sunset
Photography With Natural Light
By Richard Haan
Being a good photographer, you will find that the weather can be to your advantage as well as a disadvantage. While it is impossible to control the weather, you may not have ideal conditions all the time for your shots, however you can make the most of what conditions you have. So no matter if it is sunny, rainy or even cloudy, you can still use the landscape to create beautiful shots.
There are really two ideal hours of the day that photographers just love to shot. The first of these two occurs right after sunrise and the other is, you guest it, just before sunset, and are generally longer during the summer and shorter during the winter. You may be wondering why these two hours are the ideal hours for shooting, during the early morning and late afternoon the sun is positioned for dramatic lighting, but will not create harsh shadows or blazes of light, especially when it comes to taking pictures of people.
There are three possible problems that can occur with shooting pictures of people in the late morning. The first, your subject is trying not to squint in the direct sunlight, this can cause a poor shots. Second, your subject can turn out to dark with them standing with the sun behind them this will cause a silhouette effect. Third, your subjects face and features can look distorted if they are standing with the sun at their side, which will create awkward shadows. These three possibilities can and will make for poor shots.
During the noon time hours, all the shadows will be disappear, which then will give your photos a flat appearance.
This is why shooting just after sunrise and just before sunset, will provide just the right kind of lighting and shadows, which in turn makes for a beautiful photographic opportunity because of the breath taking natural colors the sky has to offer.
Take advantage of cloudy or overcast days, for these will give you great shots as well.
More outdoor wedding pictures are taken on cloudy days, than bright sunny days. The reason being is the photographer is taking advantage of the earth's natural filter, the clouds. I am not referring to a heavy cloudy day, but rather a mild overcast day. The clouds will diffuse the bright light so that your subject is illuminated with natural filtered light, and the shadows are gone. You may still need a flash if the clouds are too heavy, but if this is the case than the possible solution is to also shoot in black and white.
Believe it or not you can still get great shots even on rainy days. The rain can add an interesting element to the image and you will still get a great shot. Extra care is needed on rainy days as not to let your equipment lay on the wet ground, and additional person will be needed on these days of shooting. The use of an umbrella and a water proof case will be very helpful as well. Thunder and lightning and rain make for great pictures, but caution is need when taking these shots as well.
So Use Nature To Your Advantage, and Happy Shooting.
My name is Richard Haan, I am the owner of http://www.rmhdigitalcameras.com
Article Source: http://EzineArticles.com/?expert=Richard_Haan
http://EzineArticles.com/?Photography-With-Natural-Light&id=1799915
Wednesday
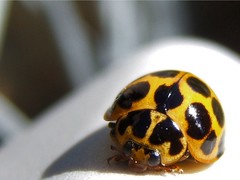
Yellow Ladybird (Closer-up)
Let us take it from the basics of what super macro photography is. Super macro is referred to the photographing of subjects at a ratio of more than 1:1. Normal macro is when we shoot at 1:1 magnification ratio, that is the 1mm of the subject is produced on the sensor as 1mm. Now super macro photography is when we represent 1mm on the subject as more than 1mm on the sensor.
What does super macro photography do?
The photographs become so detailed that you can compare them to looking at an object through a microscope. These photographs have vivid detail of the miniature world. Commercially they are required for text books journals etc. They are also used in advertisements and such promotional materials. Most importantly it allows the photographer to capture a world that is not seen with the naked eye.The image below shows a super macro of a leaf.
How is it done ?
There are mainly four ways that photographers achieve this type of photography.Super Macro Lens
The easiest and best results are go with using a Macro lens that provides more than 1:1 ratios, a good example would be Canon MP-E 65 mm f/2.8. This lens lets you take up to 5:1 macros. The above said lens is a manual focus lens and costs nearly 900$. More advance lens costs even more.Diopters on normal macro lens
Another easier method is to use diopters or closeup filters on 1:1 macro lens. This will let u go closer and thus obtain higher magnification. The results will not be as impressive but this is definitely cheaper than buying a lens. This option also reduces number of equipment needed to be carried. The magnification achieved is limited.Reversing
This is done by reversing ,preferably, a wide angle lens in front of a longer lens. This yields better results than diopters and comparable to dedicated lens but some times results in reduced functionalities like lack of auto focus and so on. This method can yield very high magnification. There will be problems of vignetting in some combinations.Bellows
This involves loading the lens on a below or using extension tube. Bellows allow variable adjustment but limits mobility. Bellows reduce the amount of light available as the length increases. This is a less preferred methods but some photographers working in studios prefer this method, as they can control the lighting and they don't need mobility.Now to the 5 tips:-
1. DOF:- Super macro means super importance to DOF, this means u will need to either make really tough decision on where to focus. The fact that most of these setups reduce total light will make it more difficult to working at higher f-stops. One method would be to take multiple images with varying areas in focus and combine them to get the desired image.2. Lighting:- Most of the above setups will reduce total light available thus, artificial lighting is very important in super macro photography. Use external flashes, it will be convenient to use a ring flash. If there is more light to work with the image can be captured much better. This means that investing in a good lighting device will be worth every penny.
3. Stability:- The high amounts of magnification means that you will need very high stability, this means you will need a very steady tripod for one. The setup is very sensitive due to the high magnification so you will benefit from using a remote release. Another feature you will benefit from would be live view to increase stability.
4. Subject:- Live insects will not make good subject for super macro simply because they keep moving. Good subjects would be dead insects and other such subjects that will not move. Flowers and their interiors make very interesting subjects too. Small stone , twigs etc also have a lot of story to tell. Remember that the possibilities in the miniature world is limitless there are so many things that we can capture, but as mention before lighting is very important.
5. Perspective:- As in any type of photography perspective is important in super macros also. The angle the framing everything counts. When working at high magnification it can be a very precise maneuver that sets it right or makes it all wrong.
The possibilities are limitless so keep in mind these tips and start experimenting.
Some samples of what can be done : -
http://www.randomequations.com/2008/11/15/5-tips-when-making-a-super-macro-photography-setup/
Shereena Vysakh is a Pro Photography Hobbiest Blogging at RandomEquationsArticle Source: http://EzineArticles.com/?expert=Shereena_Vysakh
http://EzineArticles.com/?5-Tips-For-Super-Macro-Photography&id=1695326


